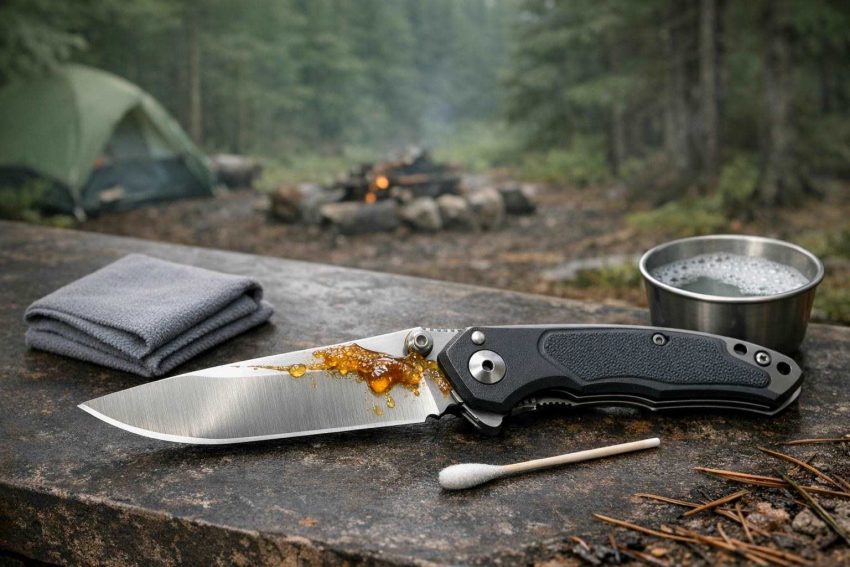
Reverting your outdoor knife to its former useful self after it has come into contact with tree resin can be a sticky business. If not dealt with in the proper manner, the wrong means of removing sap can often cause more problems than it solves. In an attempt to remove stubborn resin, rough abrasives, hard scrapes, and harsh solvents are often employed to try and tackle the problem. Such methods often result in discolouration, stripping of finish, and worst of all, the introduction of dirt and grime into the knife handle and pivot.
Start with a safe inspection
Start with a safe inspection. Open the knife and see where the sap has formed. Look at the blade, the blade flats, the spine, the choil, the screws, and any other joints or locking mechanisms. Consider that sticky sap can get into tight spaces and could cause problems with movement of a folding knife. Work carefully with the blade open, and make sure to keep your fingers away from the edge.
Protect your fingers. When a knife is folded make sure to keep your fingers away from the blade. When working with a fixed-blade knife place the blade on a hard, clean surface with the edge of the blade away from you. Also, be careful that loose gloves do not get caught on the edge or in the hardware of the handle.
Dirt, very fine sand, wood fibers or even moisture in the sap all will create scratches on the blade when cleaning off the sap. A good inspection in advance of how to best to clean a blade of sap will pay off in the end and prevent unwanted scratches to the blade.
Choose a remover that matches the contamination
To clean up a very lightly coated knife simply use a soft cloth with a dilute solution of mild soap in warm water (and scrub both sides of the blade). Change to a clean part of the cloth as the sap lifts off the blade and work from one end to the other to prevent re-depositing the same sap on to the clean part of the blade.
Pouring a household oil (olive oil, coconut oil, the like) onto a knife in order to dissolve dried sap is a terrible idea. It's easier to apply such an oil to a soft cloth or to the cotton end of a cotton swab and to wait a moment or two for the sap to dissolve. The oil will leave behind a rather sticky film, which will need to be cleaned off using a degreasing type of cleaner and thoroughly drying the blade. Better solvents exist for removing dried sap from a knife, and such should be used rather than a household oil.
However, you must be cautious and remember that solvent cleaners, harsh abrasives, and even alcohol can affect knife finishes, coatings, stick-on adhesives, many types of plastic, and handle materials such as wood, graphite, and anthracite. Check the care of your knife and test any cleaning products on an inconspicuous area first. Remember never to mix different cleaning products together.
Lift the softened sap without damaging the finish
Using a soft cloth (such as a microfiber cloth, or soft paper towels) gently wipe away the softened resin in the direction of the knife's edge. Use a clean part of the cloth as you go to avoid redepositing the sap. A clean wooden toothpick can be used to gently loosen up sap in small grooves but use extreme caution and only with a very round tip, pressed very lightly against the blade.
For a knife with a broad blade, such as a utility knife, a plastic scraper will work best for removing sticky sap or grime from a flat surface. As with the above tip for a narrow blade, the edge of the scraper should be clean before scraping the blade to prevent dirt from the scraper getting stuck in the blade's surface. Work the scraper almost flat against the blade to prevent scratching.
Be very careful not to move the blade while cleaning the edge and do not use the point of the blade to try and dislodge sap. Rather, support the blade and clean the edge from the spine to the edge with the blade still in the closed position.
Note: Folding knives: Be very careful to avoid getting oil or cleaner into the pivot area of your folding knife. Work the lightly dampened swab around the joint and then remove any residue with a dry swab. If the knife still feels gritty or sticks, do not force it. Go to the manufacturer's web site for instructions on how to do maintenance on that model of knife.
Clean, dry, and protect the blade
If necessary, also clean the outdoor surfaces of the knife handle. Again use a mild soap solution, which should be designed for the type of handle the knife has, and then rinse the knife off and dry it with a lint-free cloth or paper. Pay special attention to edges, screws, bolt holes, and to any crevices or grooves where moisture could collect with residue.
Even when a knife has been properly cleaned, consider applying a very light protective film to it for subsequent storage. Apply only sufficient lubrication for the intended use, and make sure to select a lubricant or protective film that is suitable for the materials that the knife is equipped with. Avoid applying excessive oil or lubricant to the blade for storage as this will only serve to attract dust and get into the wooden, leather, or synthetic sheath, as well as other areas such as a pocket or into the locking mechanism of the knife.
Leather sheaths can also pick up sap. Remove the knife from your sheath for cleaning, and clean the sheath in the manner that is recommended for it. Let both the knife and the sheath dry for a few hours before storing them together. Never seal a damp knife in a sheath.
Prevent the next sticky cleanup
Maintaining your knife between tasks to ensure that it remains in good condition and that it will perform as intended, depends on the task for which the knife was selected. The utility knife is perhaps best maintained by a smooth blade finish and simple, un-recessed handle. The specialized hunting knife may need to be protected from use in mere woodcutting tasks and sharpened from time to time.
Be sure to distinguish between food cutting and cleaning of a knife for dissolving resins, and always use the cleanest products for food work. Likewise, food cleaned knives must be stored away from other cleaning solutions for resins for fear of cross-contamination or, worse, transfer of solutions to other knives. Also, a storage solution is not necessarily a cleaning solution for a cutting/meat knife.
Wait to put your sticky knife in your sheath, don't use heat to try and melt the stuck plant material, don't sharpen before you clean the blade of any residue, and don't use any powered abrasive tools to try to clean the blade of sap or other sticky plant residue. Each of these methods can cause harm to the parts of your knife other than the blade, and can even make a damaging situation worse.
You may have already done some harm and would like to remove scratch marks. If so, then scrubbing more aggressively with even rougher abrasives is likely to further erode your blade's geometry and surface finish – rapidly and unpredictably. If your knife is particularly valuable or has an unusual finish then it's best to seek the help of an expert for any such touch-up work.
Good hunting knife maintenance is not about some strong cleaner, it is about cleaning the knife with the right means for the kind of pollution and the kind of knife. First soften the sap, then remove it with clean, non-abrasive materials. Be careful with the edge, and last of all, clean and dry the blade and protect it against new pollution.